The Chinese Button Knot
紐扣結, 纽扣结, 玉結び, 연봉매듭
 Generalities
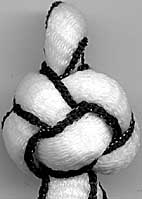
This is my favourite knot because it is both functionally useful and truly decorative. Also, there are a number of ways to finish tightening the knot making it quite flexible as well. It is called by a plethora of different names, but the one I am using is "The Chinese Button Knot" or sometimes just "The Button Knot". There has been some confusion over which knot is actually the Chinese Button Knot, but most of my Chinese language knot books describe this one. The other one that many English language knot books describe as the Chinese button knot I will designate "The Pyjama Button Knot". The Button Knot can be extended in length with a simple formula, but I have never seen instructions for more than the Double Button. While tying some of the higher order versions of the Button Knot you will begin to understand why some people make no distinction between braiding and knotting.
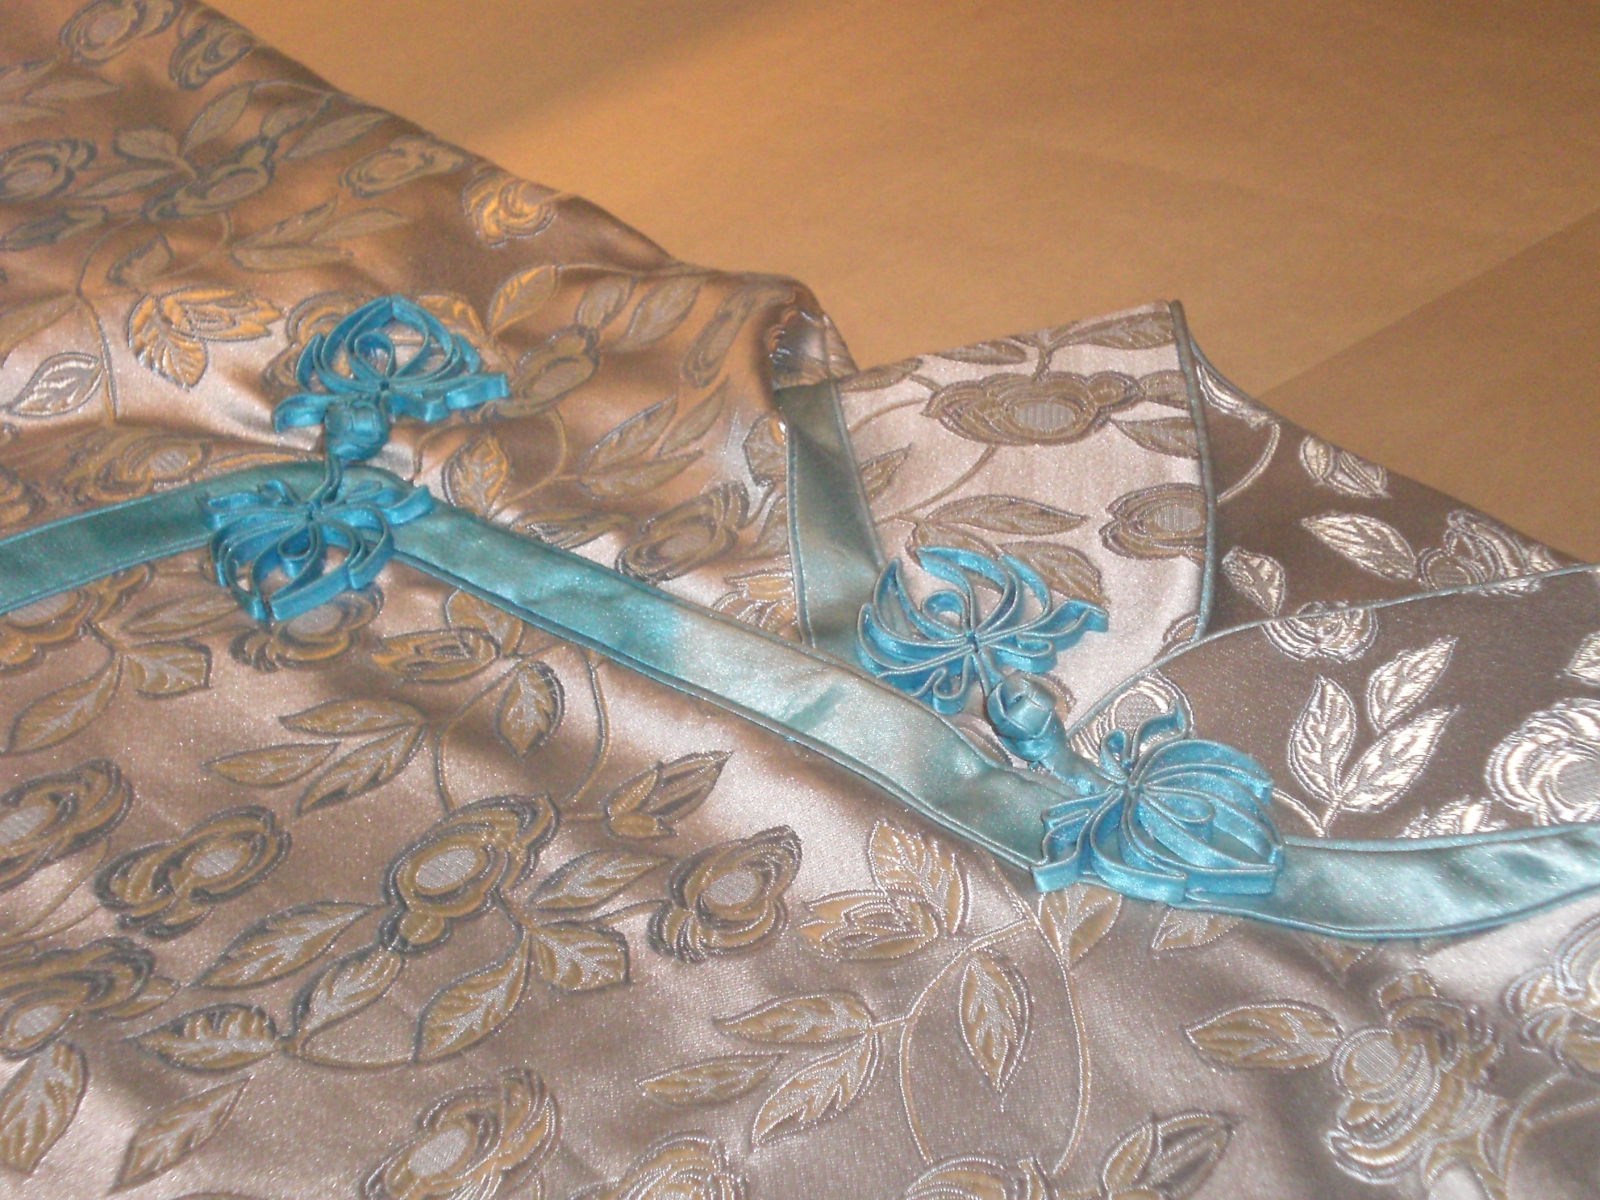
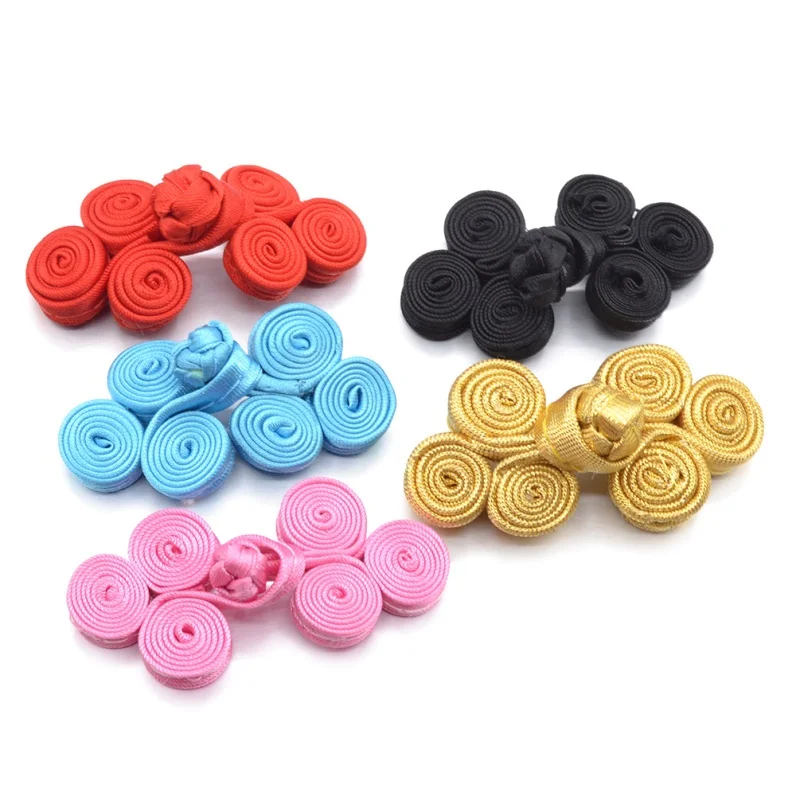
Once tied, the knot can be stitched by the cord ends to a garment to begin life as a button (with a matching loop of cord to serve as the button loop). Simple and austere, this is how it works for most martial arts uniforms. What you do with the cord ends can range from simple knots to elaborate wired, couched, coiled and tasseled designs.
A computer readable model of the Chinese Button Knot (in Stereolithography (STL, .stl) format) has been made available by Carlo H. Séquin. Who has sculpted a few versions in metal and plastic.
Nomenclature
Chen 1: Chinese Button Knot (紐扣, 纽扣) [niǔkòu] (1)Ruri-Ishikawa: 玉結び (たま むすび) [tama musubi] (1)
Korean: Lotus Bud knot (연봉매듭) [yeonbong] (1)
ABoK: #599 Chinese Button Knot, #787 sailor's knife lanyard knot, marlingspike lanyard knot, single strand diamond knot, two strand diamond knot, bosun's whistle knot
Jack Keene: Boy Scout's Friendship Knot
Translation Notes
Lydia Chen, whom we usually use as the official word on Chinese knotting names the Chinese button knot (鈕扣, niǔ kòu, 钮扣) which machine translates to English as "Buttons" versus the machine translation from English of "button" (按鈕). Interestingly, the knot is also called 紐扣 (niǔkòu, 纽扣) by Classical Chinese Knotting and others. A quick non-exhaustive survey of my Chinese books puts it at about 50/50 using 鈕扣 vs 紐扣. It's not a simplified versus traditional issue. The interesting part is that both machine translate as "button" and both are pronounced exactly alike. Asking my dad (the mathematician) he says the radical for 鈕 is "gold" (金) and the radical for 紐 is silk (糸), so the implication is that while both mean "button" the buttons are of different materials, one hard, the other fabric.
The Japanese (玉結び: 玉( タマ)(たま)(tama) 結び(ムスビ)(むすび)(musubi)) is interesting in that in Chinese 玉 pretty much means "jade", but Google Translate has a massive list of translation options including "jade", "ball", "coin" and "bullet".
The Korean (연봉매듭, yeonbong) official translation is "lotus bud knot" although it machine translates as "salary knot".
How To
General Tips
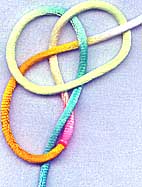
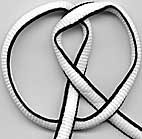
- pick a method you like. There are almost as many methods to tying this knot as there are names. Until I found the one that worked for me, it always seemed to look not quite right. I plan to present 3 methods, the first of which extends logically, the second can be tied with just one working end (very useful when you are adding one knot to a large assemblage in progress), and the third is only a slight variation but useful when you are running low on string.
- The single button knot, once tied, can be tightened in a variety of ways, check them out at the end of the instructions for the spiral method.

Note: only this method includes the tightening variations.
Note: learn the Single Chinese Button Knot (Spiral Method) first!
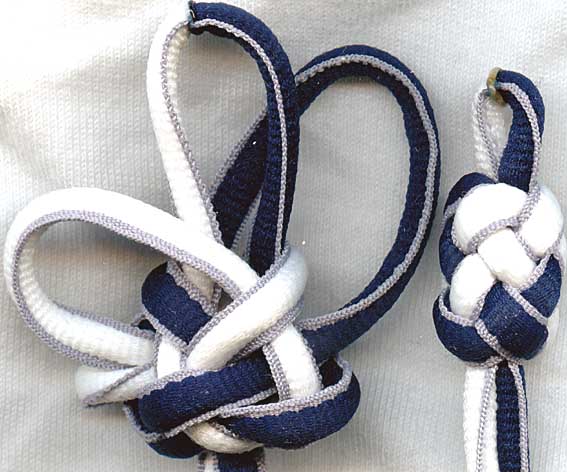
As you progress from the single button through to the 4 button, the pattern of how to make a knot as large as one has the patience for should become clear.
There are well over 50 variants on the lanyard style button knots before one even gets to the flat-topped button knots that can be tied. How many we can cover here has yet to be determined!
Similar Knots
- Inline Chinese Button Knot
- Pyjama Button Knot
- Turk's Head Knots
- Double Connection Knot